Showing posts with label Bread. Show all posts

Monday, 25 March 2013

Hooked on Yorkie's

Have you ever had a Yorkshire Pudding??


As a self professed carb freak/meat & potatoes girl I have to admit...I LOVE THEM!! Special dinners at my Dad's house have always meant Prime Rib, Mashed Potatoes, Corn, Au Jus and enough Yorkshire Pudding to not cause physical harm to anyone because we fight tooth and nail over them...stealing them off each others plate if you're not paying attention. When I say enough to not cause physical harm, it means we need at least 3 dozen muffin tin Yorkshire's for a family of 11.

I've made and ate just Yorkshire Pudding muffins with Au Jus for dinner when I'm home alone and am proud to say I can pack back about 24 all by myself...haha Dad, and I never invited you over when I ate them...lol. There have been many evenings where my late night snack has been a dozen and when I'm done I always wonder why I didn't make more.

When my Yorkshire obsession, and yes, it's an obsession, started I always made the packaged kind that you can find in a grocery store. When I would buy said packages in the grocery store, I never just bought one or two, or even five or six...I typically bought them by the box, at least twelve packages. The packages you buy in the grocery store are great, don't get me wrong, but in my world, made in your kitchen, by you, for you just makes things that much better.

I've been making my own for awhile now and it gets me every time just how SIMPLE the recipe is. The one thing I've noticed is mine are a lot denser then the packaged kind, which also lets them suck up waaaaaay more Au Jus, but I like mine a little lighter. I found this awesome page just today called How to Cook Perfect Yorkshire Puddings, of course it was after I started making my Yorkshire for dinner tonight, and can't wait to take what I learned from it for next time. One of the things that I didn't realize is that the British and their Yorkshire is kind of like Italians and their pasta...the basics are always the same but there's some differences between the North and the South. I think I've figured out what I need to do for a "lighter" Yorkshire, but for those of you who like yours a little heavier, this recipe is for you!!

Yorkshire Pudding (Southern Version)
adapted from About.com British & Irish Food-The Best, Quick & Easy Yorkshire Pudding Recipe

Simple Ingredients
4 Large Eggs
Milk, equal amount to eggs
Unbleached All Purpose Flour, equal amount to eggs
Pinch of Salt
2 Tbsp Beef Drippings or Vegetable Oil


Yorkshire is so easy because it's measured by volume and not by weight so I cracked the eggs into a measuring cup and then added an equal amount of milk...mine ended up being just a little over a cup.  Once the milk was in I whisked it up really well and then let it rest for about 10 minutes.


Next up I measured out an equal amount of flour, so about 1 cup and sifted it into the mixture with the pinch of salt and again whisked it really well.  You don't want any lumps in the batter.  After it was nice and smooth I put it into the fridge to wait until I needed it.  I left mine for a couple hours but even a half hour will do.  Some recipes say to just leave it on the counter but with raw eggs in it and knowing it would sit awhile I decided on fridge.

Nice and smooth batter

Since I already had a roast in the oven I didn't preheat the oven, but if I didn't I would preheat the oven to 450F. 

I added about a 1/2 Tsp of oil to each one of my muffin tins to get them ready for my little Yorkies and when the oven was ready I popped that it.  You want the oil to be good and hot, almost smoking, so I leave the tins in the oven for about 3 minutes or so.

Once the oil was hot I poured the batter into the tins, you want to hear a nice sizzle as it hits the oil.  I filled them up about 2/3 full and then put them back in the oven to cook for about 16 minutes.  You want them to start to get a nice golden brown colour. 


Once they were done I always serve mine up with Au Jus for dipping:)

Of course since these were for dinner we had roasted potatoes, prime rib and asparagus to go with...delicious!!


Saturday, 9 March 2013

Pita for You, Pita for Me

Me and the kids are heading to Spring & Rawky's tonight for dinner:)  Spring's my cooking partner in crime...she makes the BEST cakes and is my go to for them because I'm not so good at them.  I found a recipe for Bacon Jam and I'm pretty sure we have a date to make some next week:) 

Anyways, there's going to be a bunch of people there and about 10 plus kids, most of them girls...poor Connor is going to be so outnumbered!!  Spring's doing up some souvlaki and other stuff and she asked if I would bring some pita's.  I've never made them before and the funny thing is I was looking at some pita recipes to try when she asked...must've been a sign:)  So here I am spending my Saturday making pitas.  I'm doing 2 different recipes to see what the difference is, mostly in method since 1 batch is doing a slow rise in the fridge for about 4 or so hours.  


The slow rise in the fridge recipe comes from a blog called Smitten Kitchen, I've found some pretty good stuff there so check it out.  The other recipe is one I ended up having to change up a bit from my 55 Classic Recipes: Bread from Around the World and it's the one I'm going to play with here:)

Pita Bread
(adapted from 55 Classic Recipes: Bread from Around the World)

225 grams Unbleached All-Purpose Flour, plus extra for dusting
6 grams Active Dry Yeast
1 Tsp Sugar
1 Tsp Salt
2/3 c. Warm Water
2 Tsp EVOO

To start it off, I proofed the yeast using 1/4 c. of the water and adding the sugar, mixing it a bit.  Then I added the yeast and let it proof for 10 minutes. 

Once the yeast was proofed I put all of the other ingredients in my mixing bowl and dumped in the yeast mixture.  I mixed that all up until everything was wet and mixed together and then let it sit for 20 minutes to autolyse it.  I did this because I'm all out of bread flour and all purpose has less gluten in it and this is a way to let the gluten start to work before kneading.

Waiting to Knead

After the 20 minutes was up, I kneading the dough for 5 minutes in my Kitchen Aid stand mixer with a dough hook.  It was still really sticky so I added another 2 tbsp of flour and let it mix another minute. 

I lightly floured my counter and dumped the dough out onto it and gave it a quick knead by hand until it was smooth and elastic.  I lightly greased a large bowl and added the dough to it, turning it over and giving it a light spray with oil.  I covered it with some plastic wrap that I had sprayed with oil and then a tea towel and put it on the fridge to rise for about an hour.


After the dough was done rising, I punched it down and divided it into 6 equal pieces on a my lightly floured counter and shaped them into balls.  Then I covered them with an oiled plastic wrap and left them to rest for 5 minutes.


Once they had rested, I refloured my counter and took each ball and rolled it into an oval about 6 inches long and 1/4" thick and placed them on a lightly floured  tea towel and covered them with a piece of lightly oiled plastic wrap again.  Then I left them to rise again for about 25 minutes.


I preheated my oven to 450F and placed one rack on the middle upper level and one on the middle lower level with my baking stones in preheating as well. 

After the 25 minutes was up I placed 2 pitas on each stone and baked them for 5 minutes, letting them puff up nicely.  They did start to brown a little, but no big deal, for me anyways. 


Once they were done I placed them on my wire rack to cool down and then put them in a basket with a tea towel over them to help keep them soft until I went to Spring & Rawky's. 

For some reason, on a whim, I decided to make up some Chipotle Roasted Red Pepper Hummus:)  This is a recipe I adapted from Epicure's Roasted Red Pepper Hummus and is the first time I've added chipotle to hummus.  I've always loved the Sabra Chipotle Hummus you can get at the grocery store so me being me, I want to see what I can do:)


Chipotle Roasted Red Pepper Hummus
(Adapted from Epicure Selections)

1 19 oz. Can Chickpeas, drained and rinsed
2 Tbsp Epicure Hummus Dip Mix
1 Tbsp Epicure Roasted Red Pepper Dip Mix
2 Tbsp Sundried Tomatos, minced
1 Tsp Ground Cumin
1/2 Tbsp Dried Cilantro
1 1/2 Tsp Chipotle Chili Powder
1/4 c. Warm Water
3 Tbsp Lemon Juice
5 Tbsp EVOO
1/4 c. Tahini, optional
(I didn't have any, was gonna make some, got lazy & didn't, wish I did)


Take all ingredients and put in food processor.  Process until smooth.  For me, it's usually a minute or so, I don't like it very chunky. 


That's some nice looking hummus if I do say so:)

Tuesday, 5 March 2013

Pasta Tuesday

Aaron's working again tonight and I'll admit it, the nights he works end up being a quickie dinner a lot of the time, or something easy I know I won't have to fight with Connor to eat.  It just makes my life easier and my nights saner:)  Even though tonight's dinner isn't a quick 5 minute put together it's one I really enjoy making...remember how I'm a bit of a carb freak...pasta is my carb of choice and lucky for me, it's super easy to make my own and I just love the taste and texture of fresh pasta compared to dried. 

Tonight's Dinner

Back in the day, when I was playing basketball on a regular basis, I would have pasta the night before every game.  I'm sure my mom was sick of it, unfortunately for her, I was home before she was and usually had dinner started.  One of my all time favorite pasta dishes is Fettucine Alfredo, the richer the better.  When we go out for dinner to The Barrel in Simcoe, which in my opinion is a great little Italian place to eat, I always get the Alfredo and Calamari, I don't even have to look at the menu.  Connor shares my love for the "white sauce", he doesn't just eat it, he inhales it, which makes is a perfect dinner for tonight.

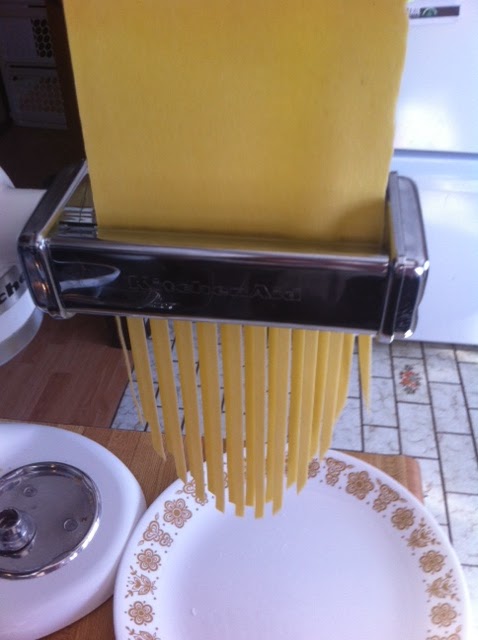
The actual making of pasta is easy, and if you're lucky like me and have a Kitchen Aid stand mixer with the pasta rolling and cutting attachments, it's a breeze.  If you don't and have to roll by hand, which I've done, you can skip the arm workouts for the next week because you're gonna get one hell of a workout.  After hand rolling pasta the first time I understood why Italians have such a respect for their mother, its because she'd have no problem knocking their heads off with the strength she must have in those pipes to roll out so much pasta. 

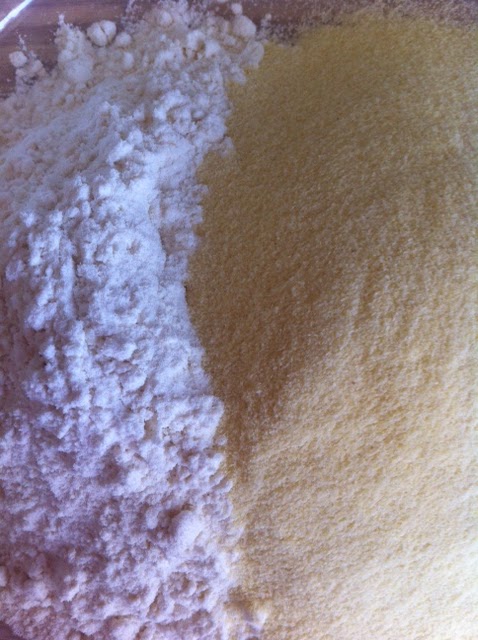
I spent a looooooong time trying to find different pasta recipes, there are so many and even Italy has it's own regional variations.  I finally just decided to wing it with the basics...one egg for every 100 grams of flour and go from there.  What I've found, and this is completely a personal preference, is that a mix of Durum Semolina Flour and White Bread Flour gives a great texture, it holds up well to both creamy and tomato sauces and it has a great flavour.  I didn't realize it until I read the 10 Rules of Pasta but we do it all wrong here...the pasta is the dish, the sauces are just a complement which is why some pasta dishes are so good and some are so blah...if the pasta is blah, that's never a good thing.

Homemade Pasta
(This makes about 10 ounces of pasta, enough for Connor, January & I)

My Flour Mix:)
100 grams Durum Semolina Flour
100 grams White Bread Flour
2 Large Eggs, slightly beaten
Pinch of Salt

To begin, mix the flours and salt together and then make a well in the centre.  Add the eggs to the well and start drawing flour in.  I've watched videos of Italian grandma's being able to do this on just a cutting board and never having the egg slip out...I can't so I do it in a bowl.  You'll end up with a chunky, shaggy dough. 


From here, I dump it all out on my counter and start kneading everything together.  Pasta dough has a lot more ooomph then bread dough, it's tougher, so you really have to put some muscle in it to knead it.  It takes me about 10 minutes or so of good, solid kneading for it to be ready.  The easiest way to describe it is, it looks and feels like good leather, smooth and satiny. 


Just dumped out on the counter

About 3 minutes into kneading

Finished Kneading

Now, cover it with a tea towel and let it rest for about 20 minutes.  Allowing it to rest gives the dough a chance to relax, you'll notice it's a lot softer and easier to work with.  If you make the dough in the morning and want to wait till the evening to roll it out and cut it, you can wrap it with plastic wrap and throw it in the fridge.  Pull it out about a 30-45 minutes before you're ready to roll to give it a chance to warm back up.  

Once the dough is rested, I cut it into four pieces and pull out my handy stand mixer and attach the pasta rolling attachement.  I put it through the first setting a few times, first after flattening it into a bit of a disk, then folding it in thirds a time or two, then in half and then move to the next setting and putting it through that once or twice and going to the next setting until I'm at the thickness I want.  
 
Ready to go through the cutter

After all the pasta has been rolled to the desired thickness I put on the pasta cutter attachment and send it through.  From start to finish, including the 20 minute rest it takes about 35-40 minutes.  In my opinion it's time well spent:) 


Once I've cut it, I sprinkle flour on a baking sheet and make little "nests" and then sprinkle them with flour as well and leave it to dry for about a half hour.  Because there is raw egg you don't want to leave it out too long...something about getting sick just doesn't sit well with me. Then, unless I'm using it right away I put it in the fridge/freezer until I'm ready to use it.


So tonight's dinner consisted off the above pasta with an awesome, super creamy alfredo sauce, garlic bread and ceasar salad with homemade browned butter and garlic sourdough croutons...super yummy.  I make my own French Bread and the spread that goes on the garlic bread and it's so tasty...way better then the store bought wrapped in foil garlic bread.  I have a few loaves in the freezer but am going to have to make more soon so, keep watching for that post:)

Tonight's Ceasar Salad...
my camera was a little off...sorry:(


Garlic Bread

Monday, 4 March 2013

Hanging Out in the Kitchen Day

After a pretty relaxing weekend...shopping at Costco, dinner at Red Lobster and then family dinner at Gramma & Grampa Smith's on Sunday I needed to get caught up in the kitchen.  Oh...I also did a snot load of laundry but was actually excited to do it because my new washer was delivered on Saturday so that meant the stackable washer/dryer was ready to use.  After seeing it put together I realized it's a good thing I'm pretty tall cause I'd have trouble reaching the dryer settings if I wasn't...lol. 

 
Aaron's back to work tonight and I like to be able to send him with some treats and Connor always needs after school snacks, of course I can't forget January, she needs something to munch on too:)  Sooooo, I spent my day making Whole Wheat Oatmeal Chocolate Chip Muffins, Big & Chewy Chocolate Chip Cookies, Toasted Arrowroot Cookies and a loaf of 12 Grain Bread.  I'm not particular so I'll just eat them all, I'm not complaining:)  Since I was pretty busy getting everything together I'm not going to give you a play by play of any of the above...if you want the muffin and cookie recipes I guess you'll just have to keep reading for the day I decide to post them...haha. 


January really seemed to like the Toasted Arrowroot Cookies that I made a couple weeks ago so I just stuck with that recipe...why fix it if it's not broken right.  I did have to make a quick ingredient change, there was no coconut milk to be found so I used whipping cream instead and they turned out fine.  I was low on butter too, so for the cookies I did part butter part melted coconut oil which turned out pretty awesome if I do say so myself. 


It's always nice to have treats that you feel good about feeding your kids, sure they have chocolate chips and some sugar in them but that's why they're a treat...not breakfast, lunch or dinner.  Besides, I made 12 Grain Bread today too to offset the total munchie fest I cooked up, that must count for something:)


After spending pretty much all day in the kitchen, I have to grab some groceries to restock and I might just cheat tonight and grab something quick for dinner...


Wednesday, 27 February 2013

Feeding my Baby


As I'm sure you're aware, I have made my own sourdough starter to use for when I'm making sourdough bread, pancakes, rolls, pretzels etc.  The great thing about sourdough is that it's survived the test of time.  There's starters out there that you can actually purchase that have been passed down since before my great, great grandma was born. 

A sourdough starter is actually a living thing, pretty crazy right...it eats, it burps to release waste and it can die.  On the plus side, a starter is a pretty hearty little creature, it can be at the brink of death and brought back to life with some tender loving care, but it's best to just feed it when it needs it, kind of like your kids. 

I started my starter very simply, with just flour and water and then I waited.  That's basically the gist of it.  I made my starter in September of 2012 and have been using it since then.  Cooking with it, feeding it, sharing it with anyone who wants some.  So, long story short, I'm going to show you how I feed my baby and you can watch her grow a little bit too:)


The first thing you want to do is decide how much of her you want to keep (I know I keep calling my starter a her, I'm positive she's female because she can be temperamental from time to time...lol).  I usually keep around 125-130 grams.  The reason for this is because you're either going to throw the excess out, I actually flush mine, its supposed to be very good for your septic system, at least that's what my gramma told me, or use it to make something or give it to a friend.  If you don't do any of the above mentioned things, buy an empty swimming pool because you'll be able to very quickly fill it with sourdough starter, no joke!!


 So, this is what I've decided to keep

Once that's been decided, I feed my baby equal parts warm water and flour.  Of course, I use my trusty kitchen scale to do this.  If I'm off by a gram or two or five, I don't worry too much, like I said, a sourdough starter is a pretty strong creature. It's when the ratios get really out of whack that funky stuff starts happening.


After I've added the flour and water, I give her a really good stir to incorporate oxygen into the mix.  Hey, a girl's gotta breathe, right.


I mentioned this in my post about making sourdough bread but, just in case you haven't read that...take note that I don't use anything metal while I'm feeding my girl.  For some reason, sourdough and metal DO NOT go hand in hand.

After giving her a good stir, I cover my girl with some cheesecloth and use the screw lid for the jar to secure it on, you could just as easily use an elastic.  I've used plastic tupperware containers before too, but just to let you know, as she eats, she burps releasing "gas", it'll pop the top off.  If you're using plastic tupperware with a lid that will just pop off it's no big deal.  If you've tightly closed it with something not quite as giving, I've read stories of explosions and sourdough starter coating everything in the nearby vicinity.  Just a word to the wise on that one. 

1:45 pm

I'm sure you see the pretty purple elastic, I put that there so I can compare the original level as she grows.  So, for "scientific" purposes...I fed her at 1:45pm, that's when this picture was taken.  We'll see what she does over the next few hours.

It's only been about 40 minutes,
but my little girl is already growing up.

2:25 pm
Wow, she's on a roll today!! I think I might end up with an
overflow if she keeps going at this rate:)

3:15pm
Look at all of those bubbles, that's my little girl hard at work!!


Just in case, I've put a plate under my growing girl:) As you can see,
she's very active.  If a starter can double itself in 8-12 hours
that's considered good, looks like my girl is off the charts right now.

4:15 pm


Thursday, 21 February 2013

A Mexican Treat for a Mountain Weekend

For Connor's 8th Birthday my mom booked for all of us to go up north this weekend and go tubing at Blue Mountain.  We're going to have a cabin to stay in and of course we, ok, mostly me, don't want to eat out every night if we have a space to cook in.  I don't plan on making any gourmet meals and I'll tell you the reason for that...my brother Ty, is one of the PICKIEST eaters you will ever meet!!  Seriously, when we were kids, if I cooked his Kraft Dinner in water from the tap (which was "town" water, chlorinated & yucky to drink) and not out of the water cooler he could tell the difference, I'm not kidding you. 


 So, mom and I were talking the other night and we decided on doing Fajitas and Tacos one night.  This is a "safe" meal when it comes to Ty and to be honest, I really like them too:)  I told mom that instead of the high sodium store bought stuff, I'd bring my Epicure Taco and Fajita Seasoning Mixes and I would make tortillas at home.  Of course her response was..."Are you sure Ty will eat them?" Being me, I assured her he would because I've cooked this "safe" meal when I've had him over for dinner here before.

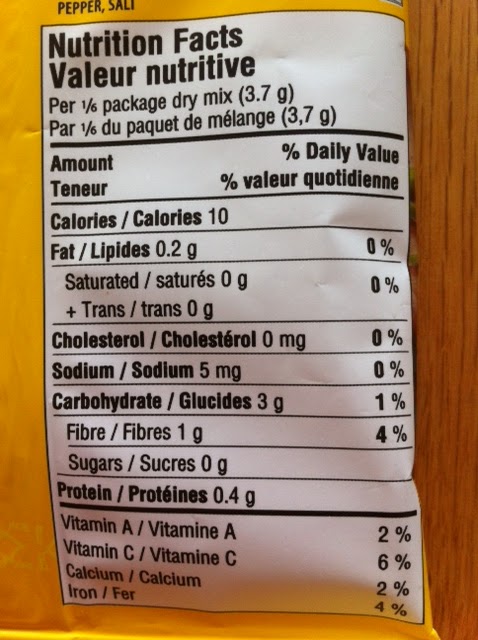
Here's a quick look at my trusty Epicure Fajita and Taco Seasoning Mixes,
take note of the nutritional info and if you want, compare to
what you have in the cupboard if it isn't already Epicure.


I decided to make up the tortiallas today so that I could get them done and out of the way.  Whenever I make flour tortillas I always use a recipe I found in a book called 55 Classic Recipes: Bread from Around the World by Christine Ingram and Jennie Shapter, you can find it here.  The original recipe calls for lard or shortening but I wanted to change it today because I noticed some ingredients in my store bought lard that have been found to be, how should I put it...not very good for you and just leave it at that.  It's not really a big change because all I did was substitute unsalted butter for the lard. 
 
I've been making my own tortillas for awhile now, are they perfectly round like the ones you find in a grocery store...no, but, they don't have a bunch of ingredients that I can't pronounce or have on hand because I'd need a lab and a white coat to cook them up.  These tortillas are super easy to make, keep well and, in my opinion, don't feel like a chunk of cardboard in my mouth.
 
Basic ingredients that I'm betting you already have on hand!!
 
Flour Tortillas
 
225 grams (approx. 2 cups) Unbleached All Purpose Flour
1 Tsp Salt
3/4 Tsp Baking Powder, I've started using Aluminum Free, just an FYI
3 Tbsp Unsalted Butter
150 mL (approx 2/3 cup) Warm Water
 
First up, mix the flour, salt and baking powder in medium bowl.  Add the butter, cut into about 1/4" thick pieces and cut in using a pastry blender or knives.
 

You want to end up with little crumbles of butter, almost the size of a pea.
 
 
Once you have the butter cut in, stir in the warm water and give it a quick knead to make a soft dough.


Cover the dough with plastic wrap and allow it to rest for about 15 minutes.

My trusty timer:)
Once it's done resting, divide it into either 8, 10 or 12 equal sized balls.  I'll be honest, I usually give mine a quick weigh to keep them as equal as possible. 


8 Balls-Approx. 50 grams each-10"-11" Tortillas
10 Balls-Approx. 40 grams each-8"-9" Tortillas
12 Balls-Approx 35 grams each-6"-7" Tortillas


Once you have them all divided, roll them out on a floured surface.  I reflour my surface after each one and pat it out into a rough circle by hand, flouring both sides a little bit before rolling because the dough is somewhat sticky and for me, it's just easier that way.
 
Honestly, I use more flour then that on the
board once I get rolling...haha, get it, rolling:)


I get this shape about 1 out of every 2 or 3...lol
After they've all been rolled out, using either a griddle or cast iron pan (I had to use my griddle because my cast iron pan was in the oven getting reseasoned) heat it up to about medium, medium-high heat and add a tortilla.  Cook for about 2-3 minutes total, flipping it over after it starts to bubble a bit.
 
Bubbling while cooking
If you're going to use them right away, wrap them in a towel to keep warm while you're cooking up the rest.  If you're going to save them for later you can reheat them by wrapping them up in foil and warming them up in a 350F oven for about 5 minutes.
 
See, how easy is that...easey-peasey.  I'll have to let you know how dinner with Ty goes this weekend, maybe I'll try to sneak some veggies in somewhere and really throw him for a loop:)