Saturday, 9 March 2013

I'm a Little Saucy Today

Since Aaron's back to work this weekend I figured I wanted something easy to make for dinner and that wouldn't cause a huge ruckus at the table.  Pizza is such a fun dinner to make, the kids can get involved, they both love to eat it and it's simple and satisfying.  I use the dough recipe out of my Cook's Illustrated cookbook, it's simple, I can do it in my food processor so it's not a lot of mess and it tastes good. 


I usually have some pizza sauce sitting in the cupboard but it's more for emergency's, I have this thing about having to do things myself.  I've made a couple different pizza sauces from recipes I've found before but they just didn't do it for me.  I spent some time finding a bunch of different recipes that looked interesting and have come up with something that will suit my taste.  Why you ask, well first off because it's going to have some sundried tomatos in it, something I picked up and have been waiting to use, but more importantly, it has wine in it and wine just makes everything better!!


Sundried Tomatos


Carrie's Pizza Sauce

1 28 oz. can Diced Tomatos
1/2 c. Onion, chopped
4 Tbsp Tomato Paste
1/4 c. White Wine (not dry, more sweet, like a Pinot Grigio or Riesling)
4 Cloves Garlic, minced
2 Tbsp Sundried Tomatos, minced
1 1/2 Tsp Dried Oregano
1 Tsp Dried Basil
1/2 Tsp Sugar
1/4-1/2 Tsp Red Pepper Flakes
1/2 Tsp Coarse Salt
2 Tbsp EVOO

I started by heating the EVOO on medium heat in a medium saucepan (saves on dishes).  In went the onion and I sauteed that for about 5 minutes and then added the garlic and sundried tomatos for about 30 seconds or so.  Next up was the wine, oregano, basil and red pepper flakes, I let the wine work it's way into everything for a minute or so.


Then I added the rest of the ingredients and let it come to a slow boil. 


I reduced the heat and then let it simmer for about 15-20 minutes. This helps meld all the awesome flavours together:)  Once that was done, it came off the heat to cool a bit before I put it in the food processor.  When it cooled off a bit I dumped it in my food processor and processed it until it was smooth, about 20-30 seconds.


There it is, voila, an easy homemade pizza sauce:)  It made about 4 cups of sauce which is enough for 4 pizzas.  I only made 2 so lucky me, I have enough for 2 pizzas in my freezer now. 


How freaking good does that look:)  We just did one with pepperoni, bacon and cheese and the other with pepperoni, bacon, onion and cheese...nice and simple. 
 
I'm also pretty happy that I'm getting much better at shaping my dough to look more like a pizza and not The Blob...I wish I had some pics of my first pizza shaping attempts, they were pretty scary, lol.  

Thursday, 7 March 2013

Baked or Fried...That is the Question

I've always been more of a meat and potatoes kind of girl...don't get me wrong, I've always enjoyed salads but was never a huge fan of cooked veggies.  Then I met Aaron, he loves veggies, his favourite, asparagus, which of course is one veggie I wouldn't touch, I mean people call it ditch weed for crying out loud and my dad always called it dog pee sticks.  The good wife that I am though I started looking for ways to make it that would entice my palate to eat more of it, and go figure, I've found a few ways that I'll actually have seconds of:) 


One of my favourite ways is to marinade the asparagus in Thousand Islands and then throw it on the grill, my friend/wife, it's a long story, don't ask, Jenn showed me this and it's another reason I love her.  It's so crunchy and, well, grilled...grilling makes everything better.  As much as I love to BBQ, I'm not a fan of doing it in 4 feet of snow with a wind chill of 20 below, I'm exaggerating a bit but you get the point, it's just not going to happen so I've had to come up with some alternate methods.  I tried roasting it under the broiler with the dressing but that came out a soggy mess, however, doused in EVOO and sprinkled with a lot of garlic powder is pretty awesome. 

For tonight, I wanted to try something different, something crunchy, tasty and outside the box.  This is where my iPad, some paper, a pencil and creative thinking comes into play.  You know what asparagus kind of looks like, green french fries, that's right I'm making asparagus fries, and while I'm all creative and stuff, I'm going to do some baked in the oven and some pan fried to see which method works better for me...if I'm lucky, they'll both be awesome and I won't have to fight with Connor to eat his veggies!!

Crispy Asparagus Fries
(adapted from How Sweet it IsBaker Lady)

1/2 lb Asparagus
1 Egg, slightly beaten
1/4 c. Unbleached All Purpose Flour
1/4 c. Plain Bread Crumbs
1/3 c. Panko Breadcrumbs
1/8 c. Parmesan Cheese
1/2 Tsp Garlic Powder
1/4 Tsp Dried Tarragon
Pinch of Onion Powder
2-3 Tbsp Extra Virgin Olive Oil
Salt and Pepper to Taste

I started by preheating the oven to 425F.

Next, I set up the asparagus assembly line using shallow bowls.  In bowl number one was the flour and I seasoned it with some salt and pepper, bowl number two was the beaten egg and finally in bowl number three was the plain breadcrumbs, panko breadcrumbs, Parmesan cheese, garlic powder, tarragon, onion powder and some salt and pepper.

I trimmed the bottom inch or so off the asparagus and gave it a quick wash and then I  just shook it off a bit, you want some of the water to stay so the flour will stick. 

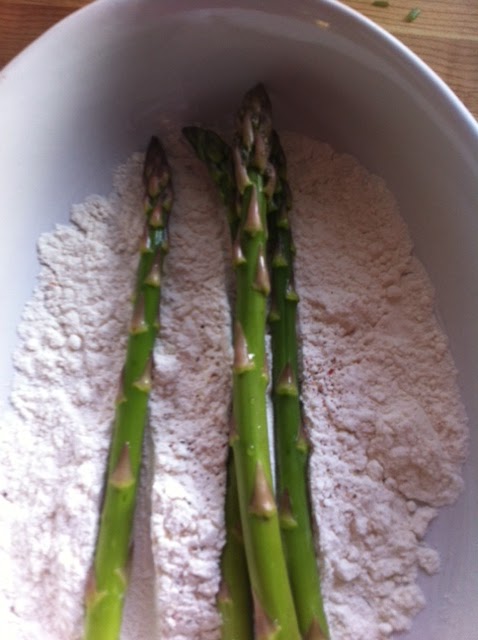
Into the flour
 
First, I rolled each piece of asparagus in the flour, coating it as much as I could and then gave it a good roll in the egg.  Then it went into the breadcrumb mixture, and I rolled it around really well and pressed the breadcrumb mixture in as best I could.

 Bread Crumb Mixture

 For the asparagus that's going in the oven I took a shallow baking sheet and placed a wire rack on top that I had given a quick spray with olive oil.  I placed the asparagus on the rack and popped it into the oven for about 15 minutes.

Ready for the oven
 
Next up was the asparagus to be fried.  I heated a large skillet over medium high heat and added the EVOO.  When it was nice and hot, it shimmers a bit when it's ready if that makes sense, I added the asparagus but only as much as it would hold in a single layer.  I fried them, turning them when they were golden, about 4-6 minutes.

 Into the Frying Pan

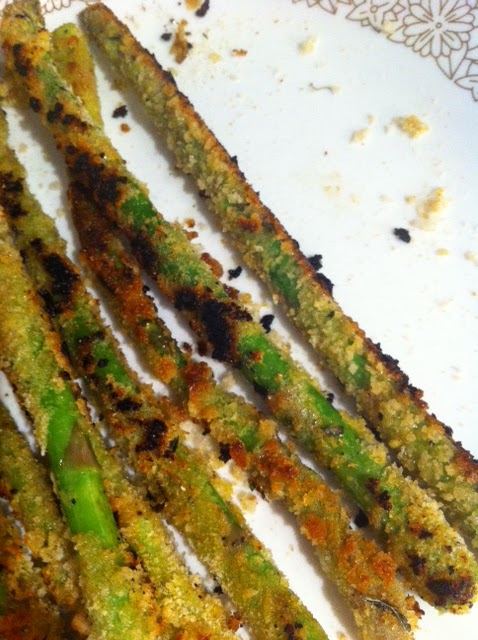
Baked
 
Fried

Once they were done I served them up with Epicure's awesome Roasted Garlic Aioli and they were awesome:)  We all liked both equally, even Connor and I would definitely make them again. 

On top of the awesome Crispy Asparagus Fries we had Prosciutto Wrapped Chicken with Herbed Ricotta and a concoction of Sprouted Rice and Quinoa with Toasted Almonds and Veggies that I came up with today. 


This has toasted almonds and sauteed celery,
carrots, green onions and garlic in it...
so good and good for you too!!


My only problem...does your kitchen look like this after dinner too...lol


Wednesday, 6 March 2013

Around the World in Time for Dinner

I seem to be all over the place lately...some Mexican inspirations, then off for some Italian and tonight I'm all about Asian inspired foods.  I should probably talk to my Mom soon, I must've caught that travel bug she always seems to have:)  I'm planning on doing an "old" standby...Asian Chicken Stir-Fry, it's a recipe that I adapted from Epicure's Asian Chicken Stir-Fry recipe and then two newbies, Blistered Garlic Sesame Green Beans and Inspired Forbidden Black Rice...both of these are recipes that I've been working on but were inspired by the following blogs and websites:

 
Have you ever heard of black rice...me neither until a couple weeks ago...I guess it was only for the Chinese Royalty back in the day and most recipes you find online call it the Forbidden Rice...how cool is that.  Black rice is considered a superfood as well, having a high nutritional value, it contains amino acids and several vitamins and minerals...check out the link above for more info.  Seeing as how it's "forbidden", I've been all over wanting to cook it:)  Since I've been forbidden I'm just going to go ahead and do it anyway, so here's today's recipe...I only like to do one recipe post a night so the Asian Chicken Stir-Fry and Blistered Sesame Garlic Green Beans will be another day:)


Black Rice...it's actually more purple then black

Inspired Forbidden Black Rice


2 cups Chicken Broth (or water if you prefer)
1 cup Black Rice
2 Shallots, finely chopped
2 Celery Stalks, finely chopped
1 Tbsp Coconut Oil
1/2 cup Toasted Sliced Almonds
Salt and Pepper to taste

Start off by soaking the rice for at least an hour to cut down the actual cooking time.  Cover it with enough water for there to be 1" over the rice.


To toast the almonds I go with one of two options, in the oven or on the stovetop.  If you're doing them in the oven, lay them in a single layer on an ungreased shallow baking sheet in a preheated 350F oven and toast them for
10-15 minutes, stirring them up a couple times.  If you prefer the stovetop, use an ungreased heavy bottomed skillet and heat it over medium heat stirring them up frequently until nice and brown. 


Once the rice is done soaking, add the 2 cups of chicken broth and rice to a large pot and turn the heat to medium, leave the pot uncovered.  I use my own chicken broth so it's not as salty as store bought kinds so I add some salt to it.  Bring it to a boil and reduce the heat to low and cover and cook for about 30 minutes (if you don't soak the rice, this could be upwards of 1 hour...there's a reason for this which is too long to explain so if you want to know, google it:).  Check the rice after about 20 minutes to see if it's done, it should be slightly chewy.  Once the rice is done, remove it from the heat and let it sit for 10 minutes to continue to steam a bit.

While the rice is cooking, heat the coconut oil over medium heat in a frying pan and add the shallots and celery.  Saute them, stirring frequently for about 5-8 minutes.  Give them a turn or two of fresh ground sea salt while they're cooking to help bring out the flavour.


When the rice is finished cooking, you may have to drain away some liquid or you might not, add the shallots, celery and toasted almonds.  Season to taste with salt and pepper and serve:)


I'm not going to lie, tonight's dinner was a toss up...Aaron and Connor liked the stir-fry, I liked the stir-fry and the black rice (it does need a little something more, a clove or two of garlic I think) and January had 3 platefuls (what a little piggie:).  January seemed to like the beans, she ate them right up, but there was something missing there for me too...I'm going to have to experiment.  I also used Avocado Oil for the first time tonight, I'm trying to get away from vegetable oils, especially canola, and Avocado Oil has a high smoke point which makes it perfect for stir-fry's...I loved it and am going to make a point of finding new ways to use it.  I'm going to have to do a post soon about the fats/oils I use and why because there is a good long reason that deserves a post of it's own. 


Tuesday, 5 March 2013

Pasta Tuesday

Aaron's working again tonight and I'll admit it, the nights he works end up being a quickie dinner a lot of the time, or something easy I know I won't have to fight with Connor to eat.  It just makes my life easier and my nights saner:)  Even though tonight's dinner isn't a quick 5 minute put together it's one I really enjoy making...remember how I'm a bit of a carb freak...pasta is my carb of choice and lucky for me, it's super easy to make my own and I just love the taste and texture of fresh pasta compared to dried. 

Tonight's Dinner

Back in the day, when I was playing basketball on a regular basis, I would have pasta the night before every game.  I'm sure my mom was sick of it, unfortunately for her, I was home before she was and usually had dinner started.  One of my all time favorite pasta dishes is Fettucine Alfredo, the richer the better.  When we go out for dinner to The Barrel in Simcoe, which in my opinion is a great little Italian place to eat, I always get the Alfredo and Calamari, I don't even have to look at the menu.  Connor shares my love for the "white sauce", he doesn't just eat it, he inhales it, which makes is a perfect dinner for tonight.

The actual making of pasta is easy, and if you're lucky like me and have a Kitchen Aid stand mixer with the pasta rolling and cutting attachments, it's a breeze.  If you don't and have to roll by hand, which I've done, you can skip the arm workouts for the next week because you're gonna get one hell of a workout.  After hand rolling pasta the first time I understood why Italians have such a respect for their mother, its because she'd have no problem knocking their heads off with the strength she must have in those pipes to roll out so much pasta. 

I spent a looooooong time trying to find different pasta recipes, there are so many and even Italy has it's own regional variations.  I finally just decided to wing it with the basics...one egg for every 100 grams of flour and go from there.  What I've found, and this is completely a personal preference, is that a mix of Durum Semolina Flour and White Bread Flour gives a great texture, it holds up well to both creamy and tomato sauces and it has a great flavour.  I didn't realize it until I read the 10 Rules of Pasta but we do it all wrong here...the pasta is the dish, the sauces are just a complement which is why some pasta dishes are so good and some are so blah...if the pasta is blah, that's never a good thing.

Homemade Pasta
(This makes about 10 ounces of pasta, enough for Connor, January & I)

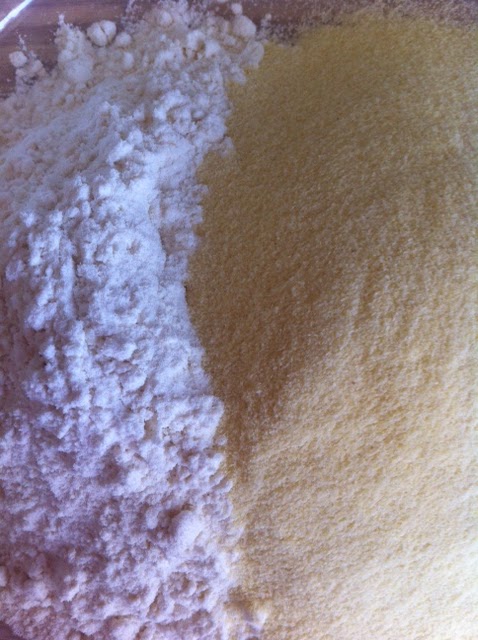
My Flour Mix:)
100 grams Durum Semolina Flour
100 grams White Bread Flour
2 Large Eggs, slightly beaten
Pinch of Salt

To begin, mix the flours and salt together and then make a well in the centre.  Add the eggs to the well and start drawing flour in.  I've watched videos of Italian grandma's being able to do this on just a cutting board and never having the egg slip out...I can't so I do it in a bowl.  You'll end up with a chunky, shaggy dough. 


From here, I dump it all out on my counter and start kneading everything together.  Pasta dough has a lot more ooomph then bread dough, it's tougher, so you really have to put some muscle in it to knead it.  It takes me about 10 minutes or so of good, solid kneading for it to be ready.  The easiest way to describe it is, it looks and feels like good leather, smooth and satiny. 


Just dumped out on the counter

About 3 minutes into kneading

Finished Kneading

Now, cover it with a tea towel and let it rest for about 20 minutes.  Allowing it to rest gives the dough a chance to relax, you'll notice it's a lot softer and easier to work with.  If you make the dough in the morning and want to wait till the evening to roll it out and cut it, you can wrap it with plastic wrap and throw it in the fridge.  Pull it out about a 30-45 minutes before you're ready to roll to give it a chance to warm back up.  

Once the dough is rested, I cut it into four pieces and pull out my handy stand mixer and attach the pasta rolling attachement.  I put it through the first setting a few times, first after flattening it into a bit of a disk, then folding it in thirds a time or two, then in half and then move to the next setting and putting it through that once or twice and going to the next setting until I'm at the thickness I want.  
 
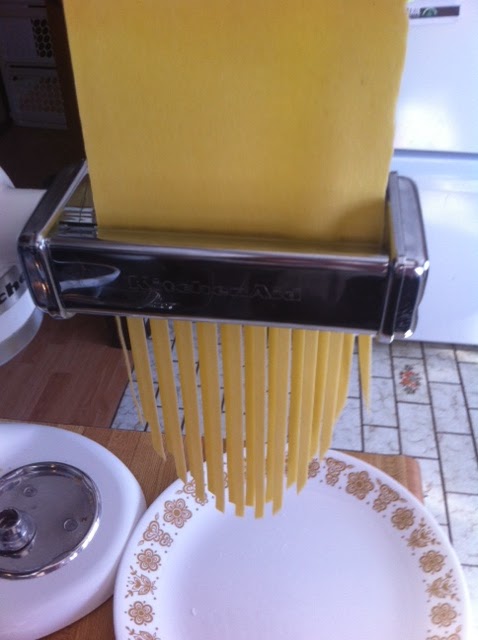
Ready to go through the cutter

After all the pasta has been rolled to the desired thickness I put on the pasta cutter attachment and send it through.  From start to finish, including the 20 minute rest it takes about 35-40 minutes.  In my opinion it's time well spent:) 


Once I've cut it, I sprinkle flour on a baking sheet and make little "nests" and then sprinkle them with flour as well and leave it to dry for about a half hour.  Because there is raw egg you don't want to leave it out too long...something about getting sick just doesn't sit well with me. Then, unless I'm using it right away I put it in the fridge/freezer until I'm ready to use it.


So tonight's dinner consisted off the above pasta with an awesome, super creamy alfredo sauce, garlic bread and ceasar salad with homemade browned butter and garlic sourdough croutons...super yummy.  I make my own French Bread and the spread that goes on the garlic bread and it's so tasty...way better then the store bought wrapped in foil garlic bread.  I have a few loaves in the freezer but am going to have to make more soon so, keep watching for that post:)

Tonight's Ceasar Salad...
my camera was a little off...sorry:(


Garlic Bread

Monday, 4 March 2013

Hanging Out in the Kitchen Day

After a pretty relaxing weekend...shopping at Costco, dinner at Red Lobster and then family dinner at Gramma & Grampa Smith's on Sunday I needed to get caught up in the kitchen.  Oh...I also did a snot load of laundry but was actually excited to do it because my new washer was delivered on Saturday so that meant the stackable washer/dryer was ready to use.  After seeing it put together I realized it's a good thing I'm pretty tall cause I'd have trouble reaching the dryer settings if I wasn't...lol. 

 
Aaron's back to work tonight and I like to be able to send him with some treats and Connor always needs after school snacks, of course I can't forget January, she needs something to munch on too:)  Sooooo, I spent my day making Whole Wheat Oatmeal Chocolate Chip Muffins, Big & Chewy Chocolate Chip Cookies, Toasted Arrowroot Cookies and a loaf of 12 Grain Bread.  I'm not particular so I'll just eat them all, I'm not complaining:)  Since I was pretty busy getting everything together I'm not going to give you a play by play of any of the above...if you want the muffin and cookie recipes I guess you'll just have to keep reading for the day I decide to post them...haha. 


January really seemed to like the Toasted Arrowroot Cookies that I made a couple weeks ago so I just stuck with that recipe...why fix it if it's not broken right.  I did have to make a quick ingredient change, there was no coconut milk to be found so I used whipping cream instead and they turned out fine.  I was low on butter too, so for the cookies I did part butter part melted coconut oil which turned out pretty awesome if I do say so myself. 


It's always nice to have treats that you feel good about feeding your kids, sure they have chocolate chips and some sugar in them but that's why they're a treat...not breakfast, lunch or dinner.  Besides, I made 12 Grain Bread today too to offset the total munchie fest I cooked up, that must count for something:)


After spending pretty much all day in the kitchen, I have to grab some groceries to restock and I might just cheat tonight and grab something quick for dinner...


Saturday, 2 March 2013

It's a Little Chili Out

It must be the cold weather that makes me crave the warmth that Mexican styled food gives me.  I don't know why, it just seems to warm me up from the inside out.  It seems that as I get older the cold holds less fun and more aches and pains.  I wonder how it is that as a kid I would have no problem jumping in a pool in the middle of April but now unless it's as warm as yellow toilet water I don't even want to dip in a toe...lol.  Needless to say, I want something to warm me up today and nothing does that like a good bowl of chili and fresh out of the oven cornbread so that's what on the menu tonight. 


Over here at Collver Inc., we have some chili problems though...I don't like beans, Aaron does and Aaron doesn't like spicy foods but I do.  I've spent some time checking out lots of different recipes, experimented with a couple and have come up with one that I wanted to test drive today.  It's a mix of a couple recipes from my Cook's Illustrated and Best of Bridge Slow Cooker cookbooks.  Another thing I wanted to try out today was using the whole dried chilis I have, I've never cooked with them before and figured chili would be a good way to start.  

Well, here I go, an experiment that I hope turns out for the good:)

Chili Con Carrie (Attempt 1)

1 Lb Extra Lean Ground Beef
2 Mild Italian Sausages, casings removed, pinched into bite size pieces
5 Slices Bacon, cut into  1" pieces


2 Medium Onions
5 Cloves of Garlic, minced
1 28 oz. Can Diced Tomatoes with Juice
1 19 oz. Can Red Kidney Beans, rinsed and drained
2 Tbsp Lime Juice
1 Cup Chicken Broth
2 1/2 Tbsp Brown Sugar
1 1/2 Tbsp Cornmeal
1 1/2 Tbsp Epicure's Chipotle Chili Powder
1/2 Tbsp Ground Cumin
2 Tsp Dried Oregano
1 Tsp Epicure's Ground Coriander
1/4 Tsp Cayenne Pepper
2 Whole Dried Chilis
1 Red Bell Pepper, chopped
2 1/2 Tbsp Epicure's Masa Harina
1/3 Cup Water
 
To start things off, I removed the stems and seeds from the dried chilis, this is where a lot of the heat is stored so that won't do, but if you like the spice, save some of the seeds for a kick of heat.  Once everything was out, I tore them up into smaller pieces and put them in a large skillet over medium-high heat to toast them, stirring frequently so they don't burn, it'll turn them bitter, and toasted them for about 4 minutes.  If they start to smoke, turn down the heat, you just want them to soften up a bit and start to be fragrant.  Once they're done, I threw them in my food processor to cool down.
 

This is where the major heat
from a chili comes from

While waiting for the chilis to cool down, I started cooking the meats.  First up was the bacon, the skillet I used for chilis, heat it over medium-high heat and add the bacon.  I wanted it to brown up and start to crisp so stirring it frequently I let it cook for about 5 minutes.  Using a slotted spoon I transferred it to my slow cooker and then added the sausage and browned it for about 2-3 minutes.  Again with the slotted spoon it went into the slow cooker.  Next up was the ground beef.  I added it to the pan an broke it up into small pieces while it was cooking, about 4-5 minutes.

Browning the sausage
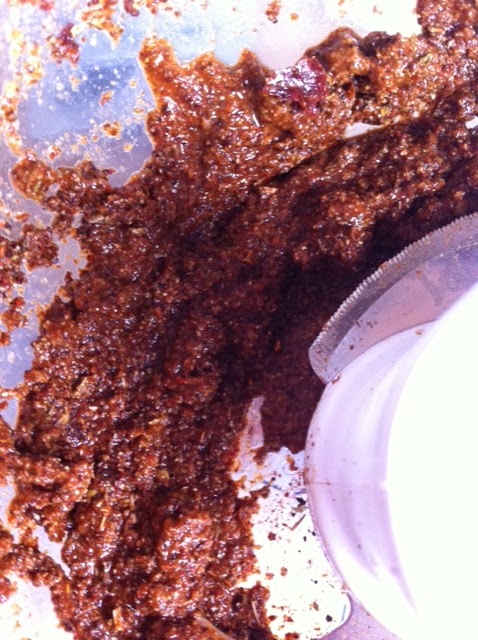
While the beef was cooking I added the chipotle chili, cumin, oregano, ground coriander and a 1/4 tsp salt to the processor and processed it until it was finely ground, about 2 minutes.  Then, leaving the processor running I added just over a 1/4 cup of the chicken stock to make a paste.  Once it was done, I scrapped it into a small bowl.  I tossed the onions into the processor next and pulsed it about 6 or so times to roughly chop them. 

Chili Paste
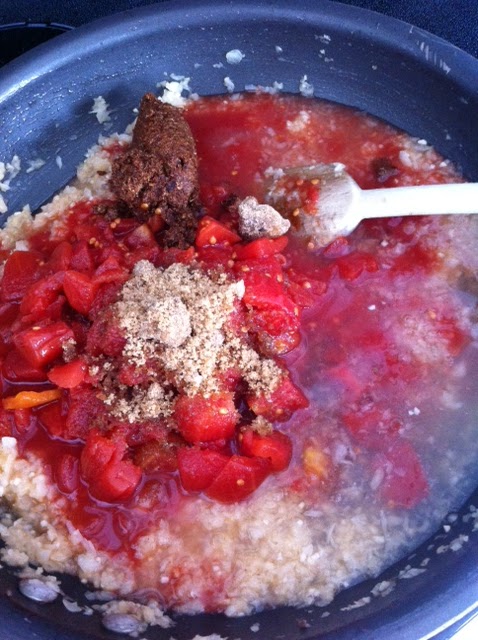
Once the beef was done cooking I added it to the bacon and sausage in the slow cooker and drained all but a tablespoon or so of the grease.  I reduced the heat on the stove to medium and added the onions and cooked them until they were softened, about 5 minutes.  Then I added the garlic and cooked it until it was fragrant, about another minute.  From there I added the chili paste, tomatoes and brown sugar and stirred it up until the chili paste was mixed through.  I added the remaining broth and brought the whole mixture to a boil, scrapping the bottom of the pan for any brown bits. 


I poured the mixture over the meats and added the beans and lime juice. Then I gave it a good stir and put the cover on.  I cooked it on high for 5 hours but you could also do it for 6-8 hours on low heat. 

About an hour and a half into cooking I had a little taste test.  There was a big bite:)  It cleared my sinuses and they didn't need clearing...Aaron definitely wouldn't be able to take it and neither would the kids, so I added another 2 1/2 Tbsp of Brown Sugar and a half a cup of water. 

About 20 minutes before serving I mixed the Masa Harina with the water and then added it to the chili to thicken it up a bit and then tossed in the chopped up Red Bell Pepper.  I had given it another taste test just before adding the peppers and Masa Harina paste and again, it was hot, so I added a 1/2 Tbsp Brown Sugar and a 1/2 Tbsp of White Sugar.

I LOVE Cornbread:)

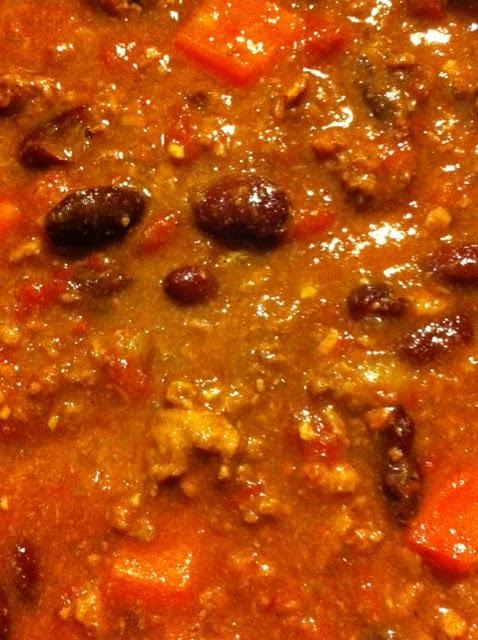
It looks good...but it'll clear your sinuses,
a little too much heat :(
After serving it up with some homemade cornbread, which was awesome, it was a good chili if you like the heat, for what I wanted not so much.  I had invited Jay over for dinner and he ended up taking the leftovers home because it was more along the lines of his taste.  For myself, I'm disappointed with my little concoction, my goal was to not have a lot of heat to it and I know I didin't acheive that.  Oh well, that's how experimentation goes, next time I'm going to try dropping the Chipotle Chili to 1/2-1 Tbsp and the Cayenne Pepper to an 1/8 Tsp and only use 1 Whole Dried Chili Pepper so that I hopefully won't have to add additional sugar and water to tone it down. 

If you like your chili with a good bite, this one's for you...if not, I'll let you know how the "toned down" version is when I make it.